Struggling with garden waste? Compost bins turn your scraps into treasure for your plants. Our blog walks you through building your own bin from scratch, using materials that might already be lying around.
Let’s get our hands dirty!
Key Takeaways
- Building a DIY compost bin is an effective way to recycle organic waste and create rich soil for your garden. You can make one from materials like old trash cans, pallets, wire fences, or plastic storage containers.
- Compost bins require proper ventilation; drill holes in your container or use materials like wire mesh to ensure airflow. Layer green kitchen scraps with brown yard waste for balanced decomposition.
- Regular maintenance of your compost bin includes turning the contents to speed up decomposition and checking that it stays moist but not waterlogged.
- There’s a variety of specialised DIY compost bins you can try out, such as tumbling bins and worm farms, each catering to different needs and producing compost more efficiently.
- By building your own compost bin at home using readily available materials, you’re not only saving money but also contributing to environmental sustainability by reducing landfill waste.
Types of DIY Compost Bins
Explore a variety of DIY compost bin options, including trash can, pallet, wooden, wire fence, tote, and straw bale compost bins. Each type offers different benefits and can be constructed from common materials found at home or in your local hardware store.
Trash Can Compost Bin
Turning an old trash can into a compost bin is a smart move for eco-friendly gardeners. First, grab a drill and make plenty of holes in the sides and bottom of your can to allow air flow, which is crucial for decomposition.
Place the bin directly on soil so that worms can enter, helping to break down organic waste more quickly.
For those keen on recycling and gardening, adding layers of green and brown materials creates the perfect mix for your homemade composting system. Greens are things like fruit peels and coffee grounds while browns include dry leaves or sawdust – these layer together inside your trash can composter.
With regular turning of the contents using a shovel or pitchfork, you’ll encourage faster breakdown and prevent foul odours from developing. Remember not to add meat scraps or dairy as they don’t belong here; stick to plant-based leftovers for best results! Keep it moist, like a wrung-out sponge, but not drenched – moisture is essential without swamping your efforts in waterlogged waste.
Pallet Compost Bin
Pallets are an excellent choice for building a compost bin at home. Start by finding four pallets of the same size and condition. Stand them on their sides to form a square or rectangular enclosure, then secure them in place with nails or screws.
For added stability, consider reinforcing the corners with metal brackets. To create a convenient access point for turning and removing compost, leave one side of the bin open or install a hinged door using additional pieces of wood.
You can easily obtain pallets from local businesses or recycling centres. Avoid using chemically treated pallets – look for those stamped with “HT” (heat-treated) instead of “MB” (methyl bromide), which may be hazardous to your health and harmful to your soil.
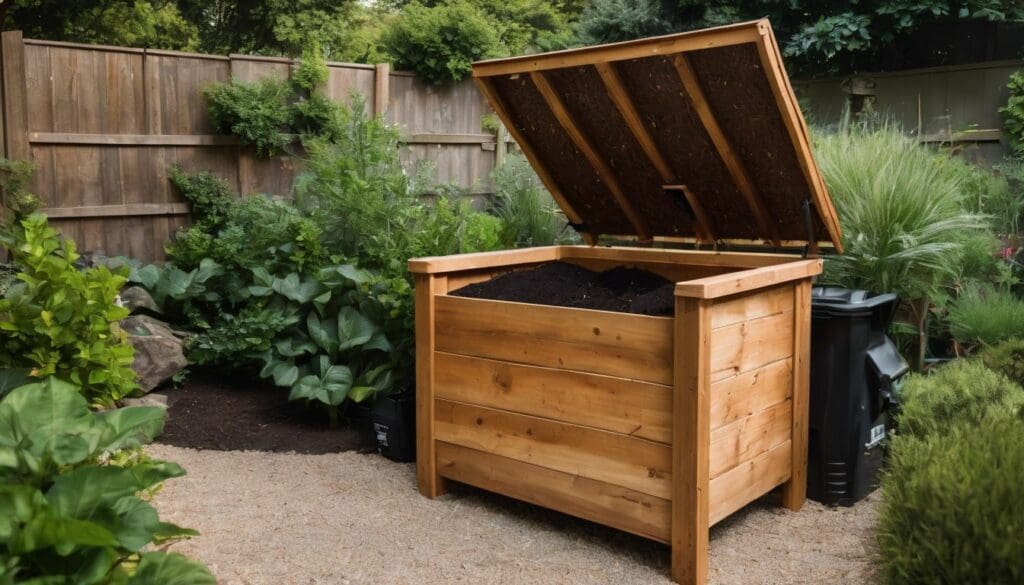
Wooden Compost Bin
Construct a simple yet effective wooden compost bin using untreated lumber. Ensure the bin has adequate airflow by drilling holes in the sides and bottom. Layer compostable materials such as kitchen scraps, yard waste, and leaves, then turn regularly to speed up decomposition.
A wooden compost bin provides a natural look that blends well into garden surroundings and promotes eco-friendly practices for waste management.
Wire Fence Compost Bin
After building a wooden compost bin, another affordable and easy-to-construct option is the wire fence compost bin. Using sturdy wire fence panels or chicken wire, you can easily create an open-air structure that allows for ample airflow, essential for the decomposition process.
The simple design of this type of compost bin also makes turning and accessing the materials straightforward. Wire fences provide a durable framework for containing your food scraps and garden waste while allowing beneficial organisms to access the pile.
Constructing a wire fence compost bin involves securing four sides of the wire fencing material to form a square or rectangular shape using zip ties or fencing wire connectors. This creates an enclosure that keeps materials contained while still providing proper ventilation required for successful composting.
Tote Compost Bin
After considering the wire fence compost bin, another simple and affordable option is the tote compost bin. This type of compost bin can be easily constructed using a large plastic tote container.
It’s an excellent choice for those with limited space or who want a portable option. The process involves drilling holes in the sides and bottom for ventilation and drainage, then layering green and brown materials inside for efficient decomposition.
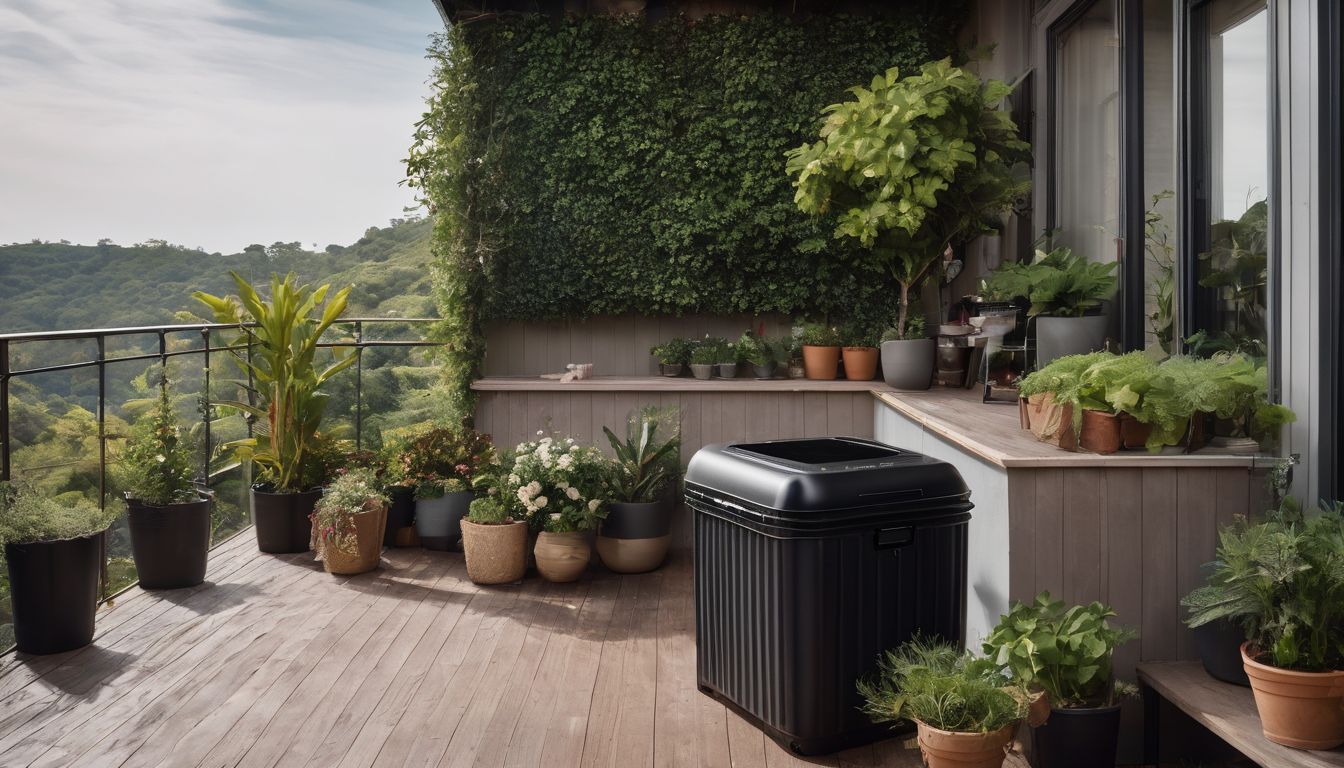
Tote compost bins are perfect for small gardens, patios, or balconies.
Straw Bale Compost Bin
To create a straw bale compost bin, position the bales in a square or rectangular shape. Stack them with the cut sides facing outwards and ensure they are tightly packed to hold their form.
You can make multiple layers for a taller bin, leaving an opening on one side for easy access. After setting up the bales, start adding your compostable materials like kitchen scraps, yard waste, and leaves directly into the centre of the bin.
As you fill it up over time, the decomposition process will begin within the layers of straw creating rich compost for your garden.
Building a Compost Bin from Common Materials
You can easily build a compost bin from common materials like plastic trash cans, pallets, wood, hardware cloth, wire fence, and straw bales. There are many DIY options available to suit your needs and resources.
Plastic Trash Can
Consider using a plastic rubbish bin as the main component for your DIY compost bin. This material is widely available and inexpensive, making it an accessible option for those looking to start composting on a budget.
Simply drill holes in the sides and bottom of the rubbish bin to allow for airflow, and your compost bin is ready to go. Additionally, its compact size makes it suitable for small spaces like balconies or patios, offering an efficient way to repurpose waste into nutrient-rich soil for your garden.
If you’d rather not invest in a specialised container, a plastic rubbish bin may be just what you need. It’s easy to modify and great for beginners who want an uncomplicated setup.
Pallets
To build a compost bin using pallets, you will need to disassemble the pallets to use the individual wooden slats. Once dismantled, arrange the slats vertically and secure them together to form an enclosure for your compost pile.
By repurposing pallets, you are not only diverting waste from landfills but also creating a functional and sustainable solution for managing organic waste at home.
When using materials like pallets for DIY projects such as building a compost bin, it’s important to consider safety measures when handling tools and ensuring that the wood is untreated or safe for use with organic materials.
Wood
Using wood to build a DIY compost bin is a popular choice due to its durability and natural aesthetic. It’s readily available, making it an accessible material for those looking to construct their own composting container.
Pallets are commonly repurposed into compost bins, offering a cost-effective and sustainable solution. By repurposing wood for your compost bin, you’re contributing to eco-friendly practices while creating an efficient system for recycling organic waste.
Another benefit of using wood is the opportunity to customise the size and design of your compost bin according to your specific needs. This allows you to tailor the structure based on available space and the volume of compostable materials generated in your household or garden.
Hardware Cloth
To build a compost bin with hardware cloth, cut the material to the desired size using wire cutters. Wear gloves for safety and use pliers to secure the edges together. Form a cylinder or cube shape and fasten it securely at all seams.
Ensure that there are no sharp edges exposed by folding them over if necessary. Now your hardware cloth compost bin is ready for use.
When constructing your own DIY compost bin, consider using sturdy materials like hardware cloth to ensure longevity and durability of your composting setup. This will help in providing adequate stability and ventilation for effective decomposition of organic waste, supporting conservation efforts in an eco-friendly manner.
Wire Fence
Creating a compost bin using wire fence is an affordable and versatile option. It allows for good airflow, which is crucial for the composting process. You can easily shape the wire fence to suit your available space, and it’s lightweight and easy to move if needed.
By layering organic materials within the wire structure, you’ll be able to build an effective compost pile that supports your eco-friendly practices.
Once your DIY wire fence compost bin is set up, you can start adding kitchen scraps, yard waste, and other biodegradable items to kickstart the process of creating nutrient-rich soil for your garden.
Straw Bales
When building a compost bin from straw bales, ensure you choose high-quality, tightly bound straw. Lay the bales in a square or rectangular shape and stack them up like bricks to create the walls of your compost bin.
Be sure to leave an opening or remove some bales on one side for easy access to turn and manage your compost.
To reinforce stability, consider driving wooden stakes into the ground at each corner and securing them with string or wire around the top of the bales. This will help keep everything in place as your compost breaks down and settles.
Plastic Storage Containers
Plastic storage containers offer a convenient and affordable option for building your own DIY compost bin. You can repurpose large, sturdy plastic containers with lids to contain and manage your compost materials effectively.
Simply drill holes in the sides and bottom of the container to provide essential airflow while retaining moisture. These containers are durable, easy to access, and can be placed in various spots around your garden or yard.
Additionally, plastic storage containers are versatile and can be stacked if you need more capacity for composting. They provide an efficient solution for environmentally conscious individuals seeking simple yet effective ways to create their own homemade compost bins at home using easily available materials.
Specialty DIY Compost Bins
– Specialty DIY Compost Bins include tumbling compost bins, bokashi buckets, in-ground compost bins, and multi-tier worm compost bins. Each of these options has unique features and benefits for those looking to tailor their composting system to their specific needs.
Tumbling Compost Bin
The tumbling compost bin allows for easy aeration and mixing without the need for manual turning. Simply fill it with organic material, close the lid, and rotate the bin regularly to speed up decomposition.
This method produces nutrient-rich compost in just a few weeks – perfect for those looking to reduce waste and enrich their gardens.
For those looking for an efficient way to produce nutrient-rich compost at home, the tumbling compost bin is an ideal solution. By rotating the bin regularly, you can create high-quality compost in a matter of weeks, reducing waste and providing your garden with essential nutrients.
Bokashi Bucket
The Bokashi Bucket is a specialised DIY composting system that utilises anaerobic fermentation to break down organic waste. It’s an airtight container which can be kept in the kitchen, making it convenient for daily food scraps collection.
The Bokashi Bucket uses beneficial microorganisms to ferment and pickle the waste, creating nutrient-rich soil conditioner. This method is ideal for those who want to compost meat, dairy, and other traditionally hard-to-compost items.
The Bokashi Bucket offers a simple way to convert food waste into rich fertiliser within weeks rather than months as with traditional composting methods, reducing the amount of organic material sent to landfills.
In-Ground Compost Bin
An in-ground compost bin is an excellent option for those with limited space or for individuals who prefer a more discreet composting method. It involves digging a hole in the ground, adding layers of organic waste and soil, and covering it up.
This process allows the materials to decompose naturally while being concealed underground, preventing any unsightly bins in your garden. In-ground composting also promotes healthier soil as the nutrients from the decomposed materials enrich the surrounding earth, supporting plant growth.
Moving on to “Multi-Tier Worm Compost Bin”, this method is particularly suitable for small spaces or indoor composting solutions.
Multi-Tier Worm Compost Bin
Expand your composting capabilities with a multi-tier worm compost bin. Utilising different levels allows for a larger capacity to process organic waste, making it an efficient and effective system for environmentally conscious individuals.
Constructed using simple materials like plastic storage containers or wooden crates, this DIY project is accessible to anyone willing to contribute to sustainable living practices.
Elevate your composting game by building a multi-tier worm compost bin from common materials in your surroundings. This system will not only enrich your garden but also reduce the amount of household waste going into landfills.
Steps for Building a DIY Compost Bin
Once you have selected your compost bin, it’s important to add airflow with holes, create a brown base, add dirt, layer compostable materials and find a convenient spot – read more about these steps in the full blog post!
Selecting the Bin
When choosing the bin for your DIY composting project, consider the amount of space you have available and the type of materials you’ll be composting. A plastic trash can or tote bin works well for small spaces, while wooden pallets or wire fence bins are great for larger areas.
The selection also depends on how much compostable material you generate and where you want to place the bin in your garden. Consider using a straw bale bin if you prefer a temporary setup or need mobility.
Once you’ve determined your space and needs, look at the different options available around your local area. There might be pre-loved containers, bins, or pallets that could be repurposed into excellent composting systems.
Adding Airflow with Holes
To ensure proper aeration in your compost bin, you can add airflow by drilling holes into the sides and bottom of the container. This allows oxygen to penetrate the compost materials, promoting aerobic decomposition.
The holes also facilitate drainage, preventing excess moisture from accumulating within the bin. By adding these airflow holes, you create an optimal environment for beneficial microorganisms to thrive and break down organic matter efficiently.
By placing strategic holes in your compost bin, you encourage healthy decomposition and prevent anaerobic conditions that could lead to unpleasant odors. Adequate airflow is crucial for speeding up the composting process and producing nutrient-rich humus for your garden or landscaping needs.
Creating a Brown Base
The brown base for your DIY compost bin provides the structure needed for decomposition. Start by laying down a thick layer of dried leaves, straw, or shredded cardboard to ensure good airflow throughout the pile.
This will help balance out the carbon-rich materials and provide a foundation for effective composting.
Once the brown base is in place, you can begin adding kitchen scraps and green waste on top of it. Remember that maintaining a balanced mix of brown and green materials is essential for successful composting.
This process sets the stage for creating nutrient-rich soil amendment for your garden or landscaping needs.
Adding Dirt
After creating a brown base, it’s time to add dirt to your DIY compost bin. Adding a layer of soil will introduce essential microorganisms that aid in breaking down organic materials.
The dirt also helps control odors and maintain proper moisture levels within the composting materials. Choose nutrient-rich soil containing earthworms, beneficial bacteria, and decomposers for the best results.
Mixing in some garden soil as well as finished compost from another batch can also jumpstart the decomposition process, leading to faster production of nutrient-rich compost for your gardening needs.
Layering Compostable Materials
To effectively layer compostable materials, start with a base of brown materials like dried leaves or straw. Add kitchen scraps and green waste in alternating layers to create a balanced mix of nitrogen and carbon.
Continue adding layers until the pile reaches around 3 feet high. Then water the layers lightly and turn the heap regularly to facilitate decomposition. Ensure proper aeration by poking holes in the pile or using a bin designed for composting.
Afterward, monitor moisture levels by checking if the heap feels damp but not soggy. The active microorganisms will break down the materials into rich, earthy compost ready for use in your garden beds.
Finding a Convenient Spot
Choose a location that is easily accessible and receives partial sunlight. Ensure the spot is near a water source for easy moistening of the compost pile. Keep the area away from strong winds to prevent drying out of the compost materials.
Consider placing the bin on level ground to avoid tipping or uneven settling, enabling efficient decomposition.
Opting for a secluded yet accessible position in your garden can make it convenient to add kitchen scraps and monitor the composting process. It also minimises exposure to extreme weather conditions, ensuring steady decomposition throughout different seasons, helping you cultivate nutritious soil for your plants.Keyword(s): Constructing compost bins, DIY compost bin materials.
Tips for Maintaining Your DIY Compost Bin
Maintaining your DIY compost bin is crucial for successful composting. Monitor the moisture levels, turn and mix the contents regularly, collect compostable materials, and know when it’s ready for use.
Additionally, consider alternative options for garden composting to maximise sustainability.
Monitoring Moisture
Regularly check the moisture level in your compost bin by feeling the contents, ensuring it’s damp like a wrung-out sponge. Adjust moisture by adding more materials or turning the pile to aerate and help control excessive wetness.
Use a garden fork or compost turner to mix in dry ingredients if your compost feels too soggy for healthy decomposition. Moisture is crucial for breaking down organic matter into nutrient-rich compost, so monitor and adjust as needed.
– Turning and Mixing Compost Materials
Turning and Mixing
Regularly turning and mixing your compost helps to introduce oxygen, which is essential for the decomposition process.
This aerates the pile and speeds up the breakdown of materials. It also ensures that all parts of the compost receive equal exposure to moisture, heat, and microorganisms, resulting in a more balanced and efficient breakdown.
Mixing green and brown materials as you turn the pile encourages even decomposition and prevents any unpleasant odors from developing. This simple step fosters a healthy environment for beneficial bacteria and organisms to thrive, accelerating the transformation of waste into nutrient-rich soil amendment for your garden.
Collecting Compostable Materials
To start collecting compostable materials, designate a convenient spot in your kitchen or garden to store organic waste. Use a small container with a lid to collect fruit and vegetable scraps, coffee grounds, eggshells, and yard clippings.
Assemble dry leaves, shredded paper, cardboard pieces, and sawdust as “brown” materials to balance the nitrogen-rich “green” waste. Regularly layer these materials into your compost bin to promote decomposition.
Ensure proper airflow by poking holes in the collected materials and mixing them occasionally for even breakdown.
Once you’ve gathered enough compostable items from your household and garden waste, layer them within the designated composting area. It’s essential to maintain an adequate mix of green and brown material within your DIY compost bin for effective decomposition.
Knowing When it’s Ready
To determine when your compost is ready, look for a dark brown, crumbly texture. The compost should have an earthy smell and feel cool to the touch. Use keywords like “compost bin” or “home composting” to find guides on testing its readiness.
You can also observe whether there are still visible pieces of materials in the compost since fully decomposed material shouldn’t be recognisable. Additionally, it’s important to check if the temperature remains consistent over time, as this indicates that decomposition is complete.
Alternative Options for Garden Composting
Once your compost is ready, consider alternative options for garden composting. One option is vermicomposting, which involves using worms to break down organic materials into nutrient-rich compost.
Another alternative is trench composting, where you bury organic waste directly in the soil to decompose and enrich it.
You can also try sheet mulching or lasagna gardening, a method of layering organic materials like cardboard, leaves, and kitchen scraps on top of the soil to create a fertile growing environment.
Conclusion
In conclusion, building your own DIY compost bin is an eco-friendly and rewarding project. You can choose from various types and materials to suit your preferences. With regular maintenance and monitoring, you can produce nutrient-rich compost for your garden while minimising waste.
By taking this simple step, you are contributing to a greener planet and sustainable living practices. Start building your DIY compost bin today!
FAQs
1. Why should I build my own compost bin?
Building your own compost bin is a green living practice that allows you to turn kitchen and garden waste into nutrient-rich soil for your plants.
2. What materials do I need for making a DIY compost bin?
For your homemade composting system, you’ll need materials like wood planks, chicken wire, or recycled plastic containers depending on the design of your DIY composting container.
3. Can I find plans for constructing a compost bin?
Yes, you can easily find homemade compost bin plans that give step-by-step instructions to help with creating a custom-made composter right in your backyard.
4. Is it hard to make my own composting setup?
Not at all! With basic home improvement tools and some effort, building DIY Compost Bins: Building Your Own can be simple and rewarding.
5. Will my homemade compost bin work as well as store-bought ones?
Absolutely! Making your own compost bin using DIY methods can produce excellent results just like any commercial bins when you follow proper construction and maintenance guidelines.